
Are you looking for a healthy snack that tastes amazing and keeps you energized throughout the day? Look no further than homemade granola bars! These little bars of joy are both satisfying and versatile, packed with wholesome ingredients that can fuel your busy life. Imagine biting into a chewy, crunchy treat filled with oats, nuts, and dried fruit—talk about a snack that makes your taste buds sing!
What makes homemade granola bars so special is the ability to control what goes into them. Unlike store-bought versions that can contain a laundry list of ingredients, you can whip up a batch at home in just about 30 minutes with your favorite flavors. Gather the family, and enjoy some quality time mixing and matching ingredients, just like making traditional cookies during the holidays. And while you’re at it, you might want to check out our classic chocolate chip cookie recipe for another family favorite that’s sure to please!
What are Homemade Granola Bars?
So, what’s the scoop on homemade granola bars? If you’re thinking, “Aren’t they just fancy rice crispy treats?”, you’re partly right! They’re a delightful combination of oats, nuts, honey, and sometimes even chocolate, all held together in a chewy, convenient bar. Historically, granola has roots dating back to the late 19th century, but now you can enjoy these wholesome bites anytime!
Imagine this: you whip up a batch of delicious homemade granola bars, and everyone in your house starts munching on them, declaring you the “Snack Guru.” After all, isn’t it true what they say? “The way to a man’s heart is through his stomach.” So, why not fill their hearts and bellies with something wholesome and delightful? Try making your own granola bars, and you’ll be rewarded with smiles all around!
Why You’ll Love Homemade Granola Bars
- Customizable Goodness: The best part about homemade granola bars is the endless possibilities! Whether you prefer nuts, seeds, or a touch of chocolate, you can mix and match to find your perfect flavor balance. Almonds with a drizzle of honey? Yes, please! Dried cranberries with dark chocolate chunks? Sign me up!
- Cost-Effective: Making granola bars at home is not only healthier, but also much cheaper than buying them pre-packaged. With a few pantry staples and some creativity, you can prepare a whole batch for a fraction of the price. Plus, you won’t feel guilty about indulging when you know exactly what you’re consuming!
- Perfect for On-the-Go: In today’s fast-paced world, having a nutritious snack on hand is a lifesaver. These homemade granola bars are perfect for busy mornings, school lunches, or as a post-workout energy boost. Just grab one and go—snack time has never been easier!
If you enjoy homemade treats, you might also love our no-bake energy bites that are as simple to make and packed with energy!
How to Make Homemade Granola Bars
Quick Overview
Making homemade granola bars is quick, simple, and incredibly satisfying. With just a handful of ingredients and around 30 minutes of your time, you can create a delicious snack that your family will adore. Plus, there’s something wonderfully fulfilling about crafting your own snacks.
Key Ingredients for Homemade Granola Bars
- 2 cups old-fashioned rolled oats
- 1 cup nuts (walnuts, almonds, or pecans work well)
- 1/2 cup honey or maple syrup
- 1/2 cup nut butter (like almond or peanut butter)
- 1/2 cup dried fruit (raisins, cranberries, or apricots)
- 1/4 cup mini chocolate chips (optional)
- 1/2 teaspoon vanilla extract
- A pinch of salt
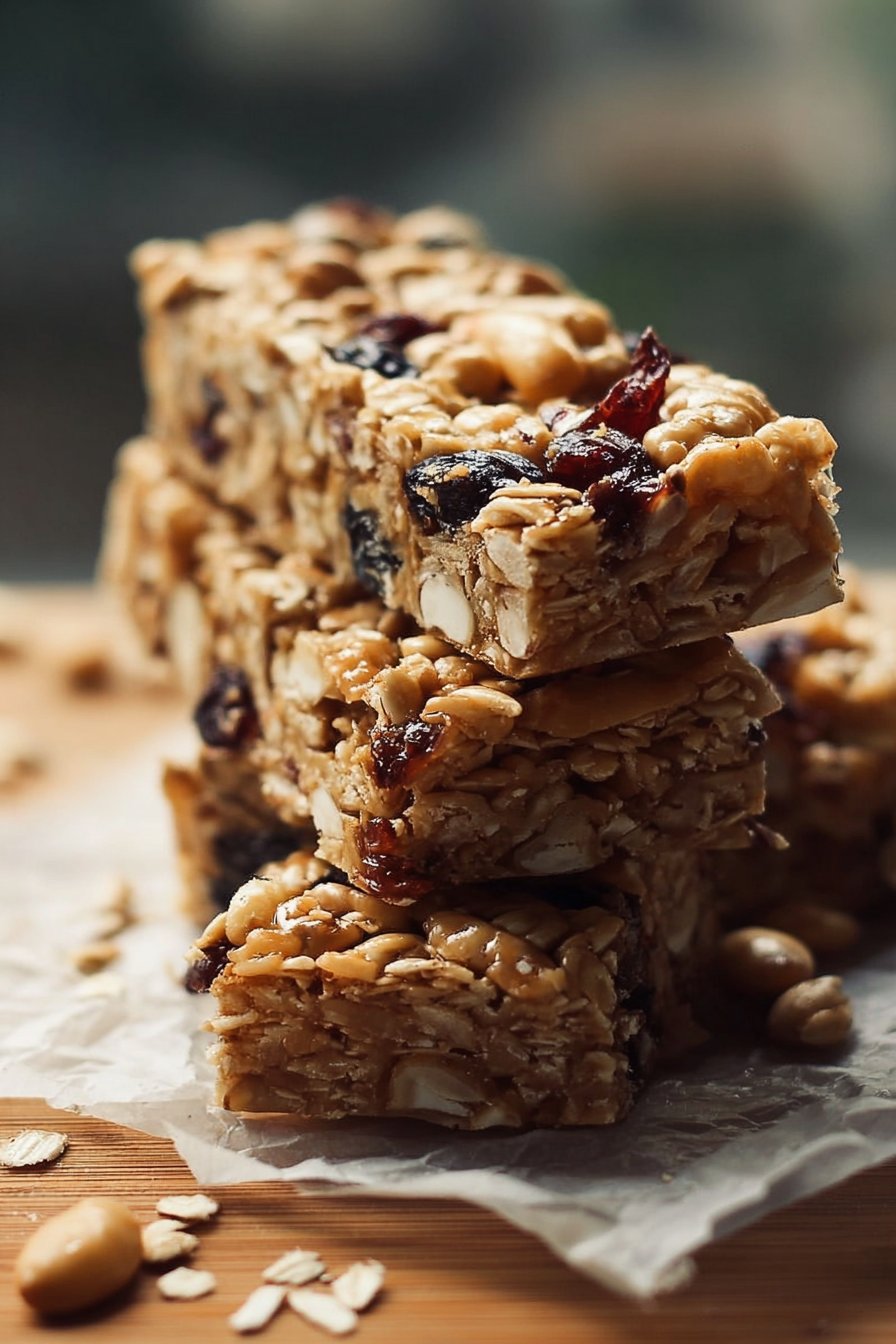
Step-by-Step Instructions:
- Preheat the Oven: Preheat your oven to 350°F (175°C). Line an 8×8 inch baking dish with parchment paper for easy removal later.
- Toast the Oats and Nuts: Spread the oats and nuts on a baking sheet and toast them in the preheated oven for 10 minutes until they are lightly golden. This enhances the flavor!
- Mix the Wet Ingredients: In a large bowl, combine the honey (or maple syrup) and nut butter. Add vanilla extract and a pinch of salt. Stir until well combined.
- Combine Everything: Add the toasted oats and nuts to the wet mixture. Mix in the dried fruit and chocolate chips (if using) until everything is evenly coated.
- Press the Mixture: Pour the mixture into the prepared baking dish. Press it down firmly with a spatula or your hands, making sure it’s compact.
- Bake: Bake in the oven for 15 minutes, or until the edges are golden brown.
- Cool and Slice: Let them cool completely before slicing into bars. You can store them in an airtight container for up to a week—or freeze them for longer-lasting snacks!
What to Serve Homemade Granola Bars With
These homemade granola bars are delicious all on their own, but you can elevate your snacking experience by pairing them with:
- A cup of yogurt for a refreshing breakfast or snack
- Fresh fruit like apple slices or banana
- A hot cup of herbal tea or coffee for that perfect afternoon boost
Top Tips for Perfecting Homemade Granola Bars
- Ingredient Substitutions: Don’t hesitate to swap the nuts or dried fruits based on what’s available in your pantry. Get creative!
- Texture Preferences: If you prefer crunchier bars, try adding a tablespoon of chia seeds or flaxseeds for an extra bite.
- Stickiness: If your granola bars seem a bit crumbly, consider adding a touch more nut butter or honey to help them hold together better.
- Avoid Overbaking: Keep an eye on your bars towards the end of the baking time. They can go from perfect to overbaked quicker than you think!
Storing and Reheating Tips
To store your homemade granola bars, keep them in an airtight container at room temperature for up to a week. If you want to prolong their freshness, wrap them individually in plastic wrap or foil and freeze them. When you’re ready to enjoy, just pull one out and let it sit at room temperature for a few minutes, or microwave for about 10 seconds if you prefer them warm.
Now that you know how to make these scrumptious homemade granola bars, there’s no reason not to give them a try! Your taste buds—and your family—will thank you! Happy snacking!
Homemade Granola Bars
Ingredients
Equipment
Method
- Prepare the pan:
- Line an 8x8 inch pan with parchment paper, leaving overhang on the sides.
- Toast the oats and nuts (optional but recommended):
- Preheat oven to 175°C (350°F).
- Spread oats and nuts on a baking tray and toast for 8–10 minutes. Let cool slightly.
- Mix dry ingredients:
- In a large bowl, combine oats, nuts, seeds, dried fruit, and chocolate chips (if using).
- Make the binder:
- In a small saucepan, heat honey and nut butter over low heat until smooth and warm.
- Remove from heat and stir in vanilla and salt.
- Combine:
- Pour the warm binder over the dry ingredients. Mix well until evenly coated.
- Press into pan:
- Transfer the mixture to the prepared pan and press down firmly using a spatula or the bottom of a glass. The firmer you press, the better the bars hold.
- Chill:
- Refrigerate for at least 1–2 hours until set.
- Slice and store:
- Lift out using parchment overhang and slice into bars.
- Store in an airtight container at room temperature (up to 5 days) or in the fridge (up to 2 weeks).
Leave a Reply