
What is Oreo Sushi Rolls?
So, what’s the deal with Oreo Sushi Rolls? Honestly, it’s one of those creations that make you wonder if you’ve just stumbled upon the best dessert hack ever! Are they sushi? Are they dessert? Well, let’s say they’re a little bit of both—a delightful fusion of flavors and textures! Picture this: creamy Oreos rolled up with a chewy rice treat outer layer, and if we’re being honest, maybe some gummy details that make each bite a colorful surprise. They say, “the way to a man’s heart is through his stomach,” and bringing this feast to the table will surely have everyone smitten! So, ready to take a culinary adventure with me? Let’s get rolling!
Why You’ll Love This Oreo Sushi Rolls
There are three standout reasons you’ll absolutely adore these Oreo Sushi Rolls! First, they are the star of any dessert spread, and their unique presentation will make you the talk of the gathering! Imagine slicing these rolls open to reveal their sweet, irresistible interior. Not only does this dish serve as a fun centerpiece, but it also satisfies sweet cravings while keeping everyone engaged.
Second, by preparing these delicious rolls at home, you’re saving money without compromising on quality. Instead of splurging on pricey desserts at a bakery, you can recreate this masterpiece for a fraction of the cost. Plus, the joy of making something from scratch always feels rewarding!
Finally, let’s chat about the toppings! Think about all the flavor combinations you can create—it’s like a blank canvas for your imagination. The crispy texture of the Rice Krispies pairs wonderfully with the gooey marshmallows, making it a delightful experience that rivals classic treats like Rice Krispies squares, but with a fun surprise. What more could you ask for? Grab your apron, and let’s get started!
How to Make Oreo Sushi Rolls
Quick Overview
Creating Oreo Sushi Rolls is as easy as pie or, dare I say, easier! The dish comes together in just about 15 minutes of hands-on preparation, with a little cooling time afterward. Picture silky-smooth layers of dessert goodness wrapped around crunchy and chewy morsels—it’s a tantalizing treat you’ll want to share. Are you ready? I know I am!
Key Ingredients for Oreo Sushi Rolls
For this recipe, you will need the following ingredients:
- 1 package of Oreo cookies (family size works great)
- 3 cups of Rice Krispies cereal
- 2 cups of mini marshmallows
- 4 tablespoons of unsalted butter
- Sour gummy stripes or any candies of your choice for a fun twist
Step-by-Step Instructions
- Prepare the Oreo Base: Start by crushing the Oreos into fine crumbs. You can use a food processor or place them in a zip-lock bag and crush with a rolling pin until they resemble sand.
- Create the Rice Krispies Mixture: In a large pot over medium heat, melt the butter. Once the butter is fully melted, add the mini marshmallows, stirring continuously until completely melted and smooth.
- Combine: Once the marshmallows are melted, remove the pot from heat and add the Rice Krispies. Mix until all the cereal is coated evenly.
- Form the Rolls: Place a sheet of parchment paper on a clean surface. Lightly grease your hands with cooking spray, then press half of the Rice Krispies mixture onto the parchment into a rectangular shape. Next, add a layer of crushed Oreos on top of the Rice Krispies and flatten gently.
- Roll It Up: Using the parchment, carefully lift one end of the rectangle and start rolling it up tightly, like sushi. Once rolled, press gently to seal the edges, then wrap the whole roll in the parchment paper and refrigerate for about 30 minutes until firm.
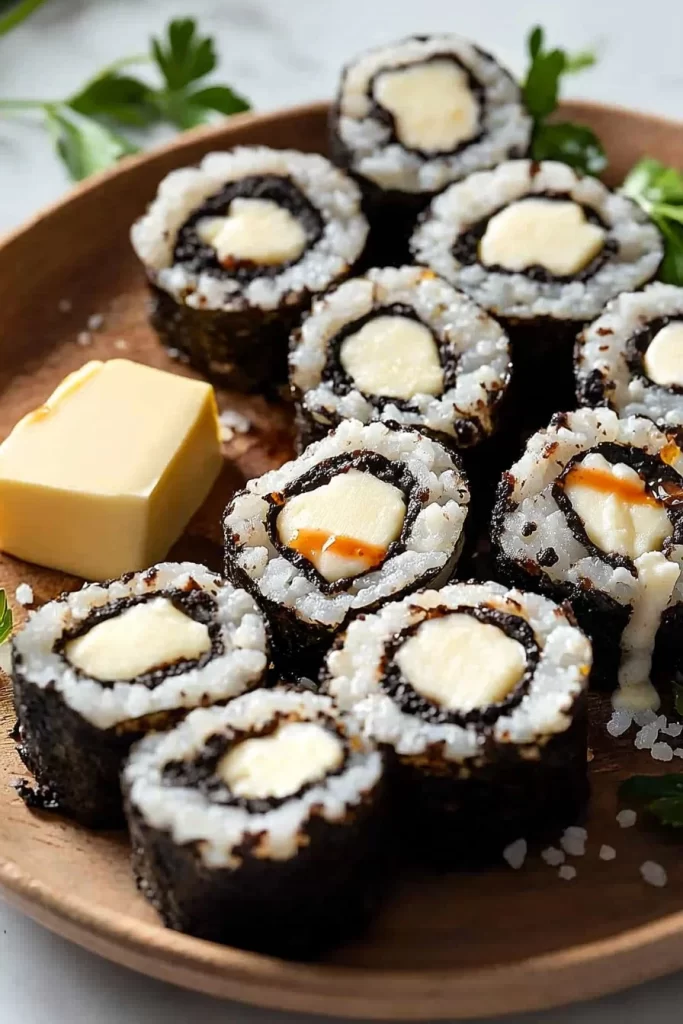
- Slice and Serve: After chilling, remove the roll from the fridge, unwrap it, and slice into pieces with a sharp knife. Finish with colorful slices of sour gummy stripes for an extra pop of fun!
Top Tips for Perfecting Oreo Sushi Rolls
- Substitutions: If you’re looking for a healthier option, consider using gluten-free rice cereal or yogurt-covered treats as a topping instead of gummies.
- Timing: Make sure to allow enough time for the rolls to chill. This will make slicing much easier and ensure the roll retains its shape.
- Avoiding Common Mistakes: Be careful not to overheat the marshmallows; otherwise, the mixture will become too hard. Just melt until smooth!
Storing and Reheating Tips
If you find yourself with leftovers (though I doubt that!), store the Oreo Sushi Rolls in an airtight container in the refrigerator for up to five days. If you want them to last longer, you can freeze individual rolls wrapped tightly in plastic wrap. Just remember to let them thaw in the refrigerator before enjoying them again to maintain that signature chewy texture!
Exploring the delightful world of Oreo Sushi Rolls is a fun way to mix dessert with creativity. With simple ingredients and a touch of imagination, you’ll have everyone at your family gathering raving about this treat! Now, roll up your sleeves and get ready to create a delicious masterpiece that won’t be forgotten. Enjoy!
Oreo Sushi Rolls
Ingredients
Method
- Crush the Oreos into fine crumbs using a food processor or by placing them in a zip-lock bag and crushing with a rolling pin.
- In a large pot over medium heat, melt the butter. Once melted, add the mini marshmallows, stirring continuously until completely melted and smooth.
- Remove the pot from heat and add the Rice Krispies. Mix until all the cereal is coated evenly.
- Place a sheet of parchment paper on a clean surface. Lightly grease your hands with cooking spray, then press half of the Rice Krispies mixture onto the parchment into a rectangular shape.
- Add a layer of crushed Oreos on top of the Rice Krispies and flatten gently.
- Using the parchment, carefully lift one end of the rectangle and start rolling it up tightly, like sushi. Press gently to seal the edges, then wrap the whole roll in parchment paper.
- Refrigerate for about 30 minutes until firm.
- After chilling, remove the roll from the fridge, unwrap it, and slice into pieces with a sharp knife. Finish with colorful slices of sour gummy stripes for an extra pop of fun.
Leave a Reply