
What are No-Bake Cookies & Cream Cheesecake Balls?
What an intriguing name, right? No-Bake Cookies & Cream Cheesecake Balls! Is it a cookie? A cake? A little ball of happiness? The answer is a resounding YES! These little spheres of joy are the love child of classic cheesecake and crunchy cookie goodness. You know the saying, “the way to a man’s heart is through his stomach”? Well, I can assure you that these cheesecake balls hold that magic power! I once made a batch for a family gathering, and they were gone in minutes—everyone couldn’t resist popping these delightful bites into their mouths. Have you ever discovered a recipe that everyone asks for again and again? That’s what you can expect here. So why not grab your ingredients and join me in creating this simple yet sumptuous treat?
Why You’ll Love This No-Bake Cookies & Cream Cheesecake Balls
There are plenty of reasons you’ll fall head over heels for No-Bake Cookies & Cream Cheesecake Balls! First, they capture the wonderfully creamy flavor of cheesecake without the hassle of baking, allowing you to enjoy a decadent dessert in no time. Second, whipping these up at home can save you money compared to buying similar treats from a store. Plus, it’s a fun way to bring family and friends together in the kitchen. Imagine your loved ones enjoying the rich flavors enhanced by a drizzle of chocolate and colorful sprinkles—how delightful is that? If you’ve tried our Chocolate-Covered Date Balls, you’ll appreciate this no-bake recipe’s balance of sweetness, making them equally irresistible but in a unique way. So, why not grab your mixing bowl and dive into this scrumptious journey?
How to Make No-Bake Cookies & Cream Cheesecake Balls
Quick Overview
Making No-Bake Cookies & Cream Cheesecake Balls is a satisfyingly simple process that brings together creamy and crunchy textures in every bite. With just a few ingredients and minimal effort, you’ll have a dessert that looks as good as it tastes. You can whip these up in about 30 minutes, with no special skills required, making them a perfect project for both novice cooks and seasoned pros. And trust me—once you take a bite, you’ll relish their delightful flavors!
Ingredients
- 8 oz cream cheese, softened
- 1 cup powdered sugar
- 1 teaspoon vanilla extract
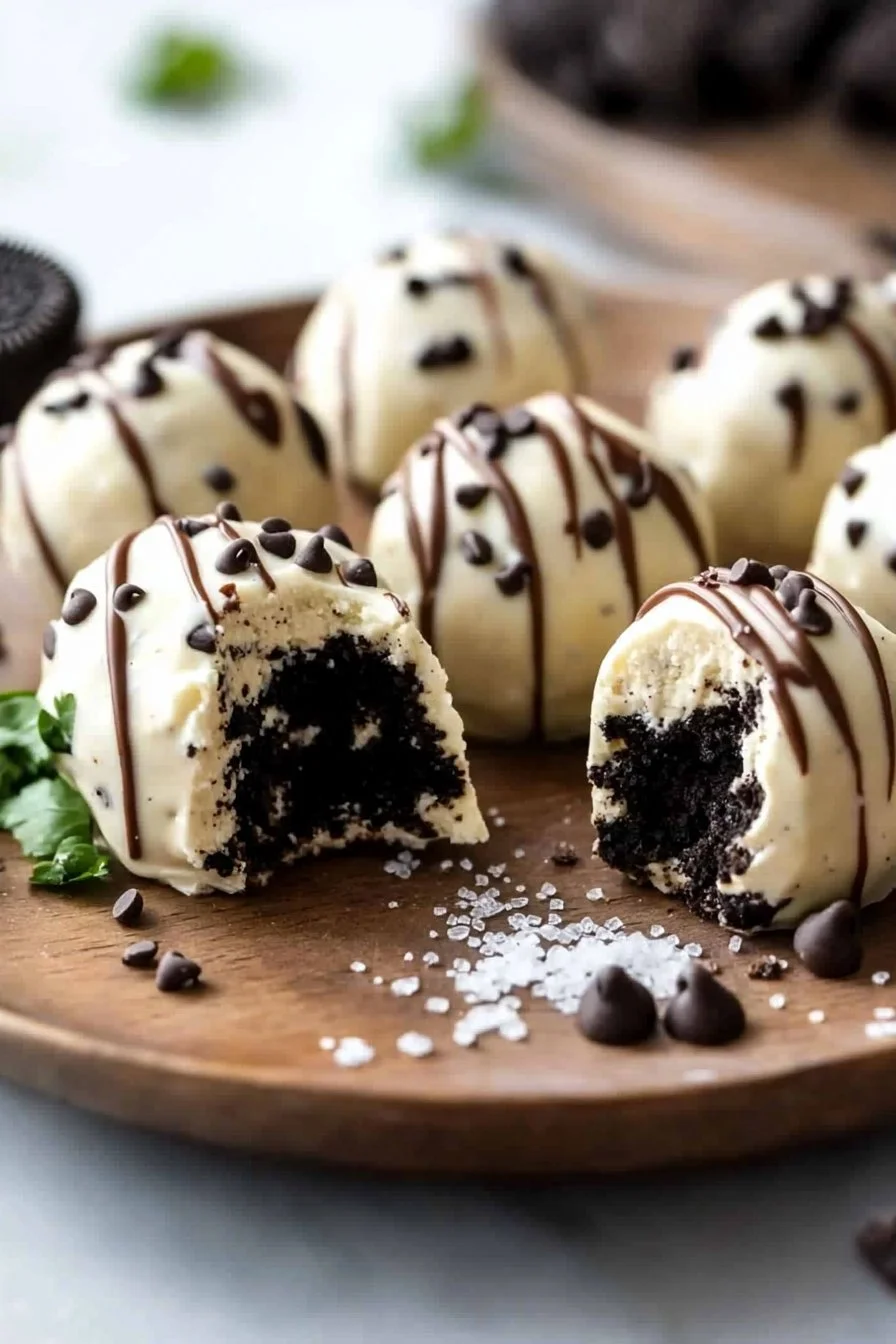
- 1 cup crushed Oreo cookies
- 1 cup chocolate chips (for coating)
- Sprinkles (optional)
Step-by-Step Instructions
- Prepare Your Equipment: Gather a mixing bowl, a spatula, a microwave-safe bowl (for melting chocolate), and a baking sheet lined with parchment paper.
- Mix the Cream Cheese: In a large mixing bowl, add the softened cream cheese. Using a spatula or a hand mixer, mix it until smooth and creamy.
- Add Sugar and Vanilla: Gradually incorporate the powdered sugar and vanilla extract into the cream cheese. Mix well until completely combined, and you have a sweet cheesecake base.
- Fold in the Cookies: Gently fold in the crushed Oreo cookies until they are evenly distributed throughout the mixture. You’ll notice the delightful crunchiness starting to appear.
- Chill the Mixture: Cover the bowl with plastic wrap and place it in the refrigerator for about 15-20 minutes. Chilling allows the mixture to firm up for easier rolling.
- Form the Balls: Once chilled, take a teaspoon-sized portion of the mixture and roll it into a ball between your palms. Repeat with the remaining mixture, placing the rolled balls onto the prepared baking sheet.
- Melt the Chocolate: In the microwave-safe bowl, melt the chocolate chips in 30-second intervals, stirring in between until smooth.
- Coat the Balls: Dip each cheesecake ball into the melted chocolate, ensuring they are completely coated. Use a fork to lift them out and let any excess chocolate fall off before returning them to the baking sheet.
- Add Sprinkles: If desired, sprinkle some colorful toppings on the chocolate-coated balls while they are still wet.
- Chill Again: Place the cheesecake balls back in the refrigerator for 30 more minutes until the chocolate is set firm.
And voilà! Your No-Bake Cookies & Cream Cheesecake Balls are ready to dazzle!
Top Tips for Perfecting No-Bake Cookies & Cream Cheesecake Balls
- Substitutions: If you prefer a different flavor, you can swap Oreo cookies with any Halal-friendly cookie. Chocolate wafer cookies work beautifully too!
- Timing: Ensure not to skip the chilling periods as they make the rolling process much easier. Firm mixtures are a breeze to shape into perfect balls.
- Avoid Common Mistakes: Make sure your cream cheese is at room temperature for the best mixing results. Otherwise, you may end up with lumps in your mixture, and we want creamy perfection!
Storing and Reheating Tips
To store your fabulous No-Bake Cookies & Cream Cheesecake Balls, simply place them in an airtight container in the refrigerator. They will stay fresh for up to one week—if they last that long! You can also freeze them for up to three months. When ready to enjoy, thaw them in the refrigerator for a few hours or overnight for the best taste and texture. Just like that, you’ll be prepared for any sudden sweet cravings or spontaneous family gatherings. Enjoy your journey into the delicious world of No-Bake Cookies & Cream Cheesecake Balls—they truly are a delight!

No-Bake Cookies & Cream Cheesecake Balls
Ingredients
Method
- Gather a mixing bowl, a spatula, a microwave-safe bowl (for melting chocolate), and a baking sheet lined with parchment paper.
- In a large mixing bowl, add the softened cream cheese. Using a spatula or a hand mixer, mix it until smooth and creamy.
- Gradually incorporate the powdered sugar and vanilla extract into the cream cheese. Mix well until completely combined, creating a sweet cheesecake base.
- Gently fold in the crushed Oreo cookies until they are evenly distributed throughout the mixture.
- Cover the bowl with plastic wrap and place it in the refrigerator for about 15-20 minutes to firm up.
- Once chilled, take a teaspoon-sized portion of the mixture and roll it into a ball between your palms. Repeat with the remaining mixture.
- In the microwave-safe bowl, melt the chocolate chips in 30-second intervals, stirring in between until smooth.
- Dip each cheesecake ball into the melted chocolate until fully coated. Use a fork to lift them out and let any excess chocolate fall off.
- Sprinkle colorful toppings on the chocolate-coated balls while still wet, if desired.
- Place the cheesecake balls back in the refrigerator for 30 more minutes until the chocolate is set firm.
Leave a Reply