
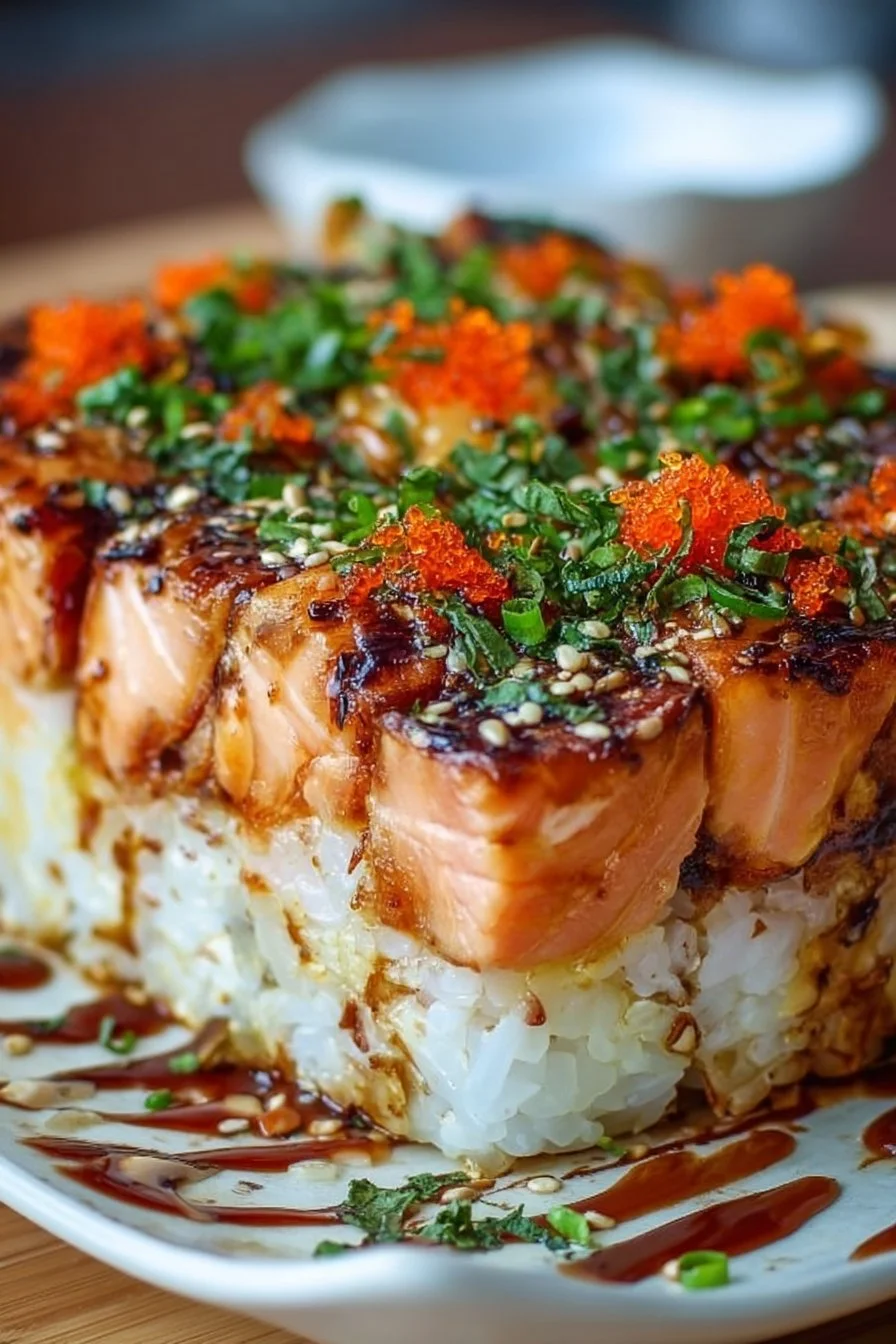
What is Delicious Spicy Salmon Sushi Bake?
So, you’re probably wondering, why the novel name, the Delicious Spicy Salmon Sushi Bake? Well, it’s half sushi, half baked goodness, and 100% delicious! The origin of this dish stems from a desire to enjoy sushi flavors without rolling anything up yourself—a lazy cook’s dream come true! Just imagine a cozy gathering with friends, where instead of the usual sushi spread, you present a beautifully baked dish that warms the heart and satisfies the palate. Let’s be honest; who wouldn’t want a slice of this creamy delight? After all, they say, “the way to a man’s heart is through his stomach!” So why not make something that’s sure to impress? Give this recipe a go, and prepare for the oohs and aahs!
Why You’ll Love This Delicious Spicy Salmon Sushi Bake
This Delicious Spicy Salmon Sushi Bake is a culinary gem for several reasons. First off, the primary highlight of the dish is its flavor—a captivating mix of creamy textures and a spicy kick from the salmon that dances on your taste buds. Secondly, making this dish at home is an amazing cost-saving option! Why pay for sushi at a restaurant when you can recreate the experience in your kitchen? Plus, it’s much more fun to share with loved ones! This dish also includes toppings like cream cheese, seaweed, and sriracha that elevate its eatability to new heights. If you love this, you might also want to check out our Spicy Tuna Poke Bowl recipe, which also captures that vibrant sushi experience while being easy to prepare. So, why not roll up your sleeves and enjoy making this dish today?
How to Make Delicious Spicy Salmon Sushi Bake
Quick Overview
Preparing this Delicious Spicy Salmon Sushi Bake is as easy as 1-2-3! Within about 40 minutes, you can create a beautiful dish that boasts a blend of flavors and a creamy, comforting texture. The best part? It’s a straightforward process that doesn’t require rolling sushi or any specialized kitchen tools. You’ll find that every bite composes a harmonious balance of rice, spicy salmon, and tasty toppings, making it a fulfilling meal that everyone will adore. So, grab your apron, and let’s get cooking!
Key Ingredients for Delicious Spicy Salmon Sushi Bake
To create this mouthwatering dish, you will need the following ingredients:
- 2 cups sushi rice
- 2 cups water
- 1 teaspoon rice vinegar
- 1 tablespoon sugar
- 2 cups fresh salmon fillet, diced (skinless and boneless)
- 1/4 cup mayonnaise
- 2 tablespoons sriracha sauce (adjust for spiciness level)
- 1 teaspoon sesame oil
- 1 cup cream cheese, softened
- 1 tablespoon chopped green onions (for garnish)
- 2 sheets of nori (seaweed), cut into small pieces
- Sesame seeds (for garnish)
Step-by-Step Instructions
- Prepare the Sushi Rice: Start by rinsing your sushi rice under cold water until the water runs clear. Combine the rice and 2 cups of water in a rice cooker or pot, and cook according to package instructions. Once cooked, transfer to a bowl and gently fold in rice vinegar and sugar. Set aside to cool.
- Mix the Salmon Filling: In a large bowl, combine the diced salmon, mayonnaise, sriracha sauce, and sesame oil. Mix until fully incorporated and set aside.
- Prepare the Cream Cheese Layer: In a separate bowl, soften the cream cheese to a spreadable consistency. You can beat it lightly or microwave it for a few seconds.
- Layer the Dish: In a baking dish, spread the sushi rice evenly on the bottom to form a base layer. On top of the rice, layer the cream cheese, followed by the salmon mixture, spreading it evenly over the top.
- Bake: Preheat your oven to 350°F (175°C) and bake the assembled dish for about 15-20 minutes, or until the top is golden and heated through.
- Garnish and Serve: Once out of the oven, sprinkle with chopped green onions, nori pieces, and sesame seeds. Enjoy warm either alone or accompanied by additional sriracha for those who like extra spice!
Top Tips for Perfecting Delicious Spicy Salmon Sushi Bake
- Use Fresh Ingredients: Fresh salmon enhances the flavor and texture of the dish, providing an unmatched creamy consistency.
- Adjust Spice Levels: Feel free to modify the amount of sriracha to suit your taste. You can even add diced jalapeños or a dash of wasabi for an additional kick.
- Perfect Cream Cheese: Ensure your cream cheese is softened to make it easy to spread. Microwaving it for a few seconds makes this much simpler!
- Explore Other Flavors: Add crunchy vegetables like cucumber or avocado for texture variation. This sushi bake is versatile, so you can adapt it to your preferences easily!
Storing and Reheating Tips
If you find yourself with leftovers (or plan to make it ahead), store your Delicious Spicy Salmon Sushi Bake in an airtight container in the refrigerator. It stays fresh for about 2-3 days. To reheat, simply place servings in the microwave for a quick option, warming until heated through. You can also pop it back in the oven at a low temperature to keep it warm without drying it out. And just like that, you can enjoy this delightful dish again!
Give this Delicious Spicy Salmon Sushi Bake a try today! It’s a perfect recipe for impressing your loved ones while keeping things easy and fun in the kitchen. Don’t hesitate—jump into this flavorful adventure, and your taste buds will thank you!

Delicious Spicy Salmon Sushi Bake
Ingredients
Method
- Rinse the sushi rice under cold water until the water runs clear. Combine the rice and 2 cups of water in a rice cooker or pot, and cook according to package instructions. Once cooked, transfer to a bowl and gently fold in rice vinegar and sugar. Set aside to cool.
- In a large bowl, combine the diced salmon, mayonnaise, sriracha sauce, and sesame oil, mixing until fully incorporated. Set aside.
- Soften the cream cheese to a spreadable consistency by beating it lightly or microwaving it for a few seconds.
- In a baking dish, spread the sushi rice evenly on the bottom to form a base layer. On top, layer the cream cheese, followed by the salmon mixture, spreading it evenly.
- Preheat your oven to 350°F (175°C) and bake the assembled dish for about 15-20 minutes, or until the top is golden and heated through.
- Once out of the oven, sprinkle with chopped green onions, nori pieces, and sesame seeds. Enjoy warm, either alone or with additional sriracha for extra spice!
Leave a Reply